How to Remove a Jacket from a Photo: Four Reliable Workflows
Four ways to handle an outer jacket, with practical instructions for collars, cuffs, shadows and the garment hidden underneath.
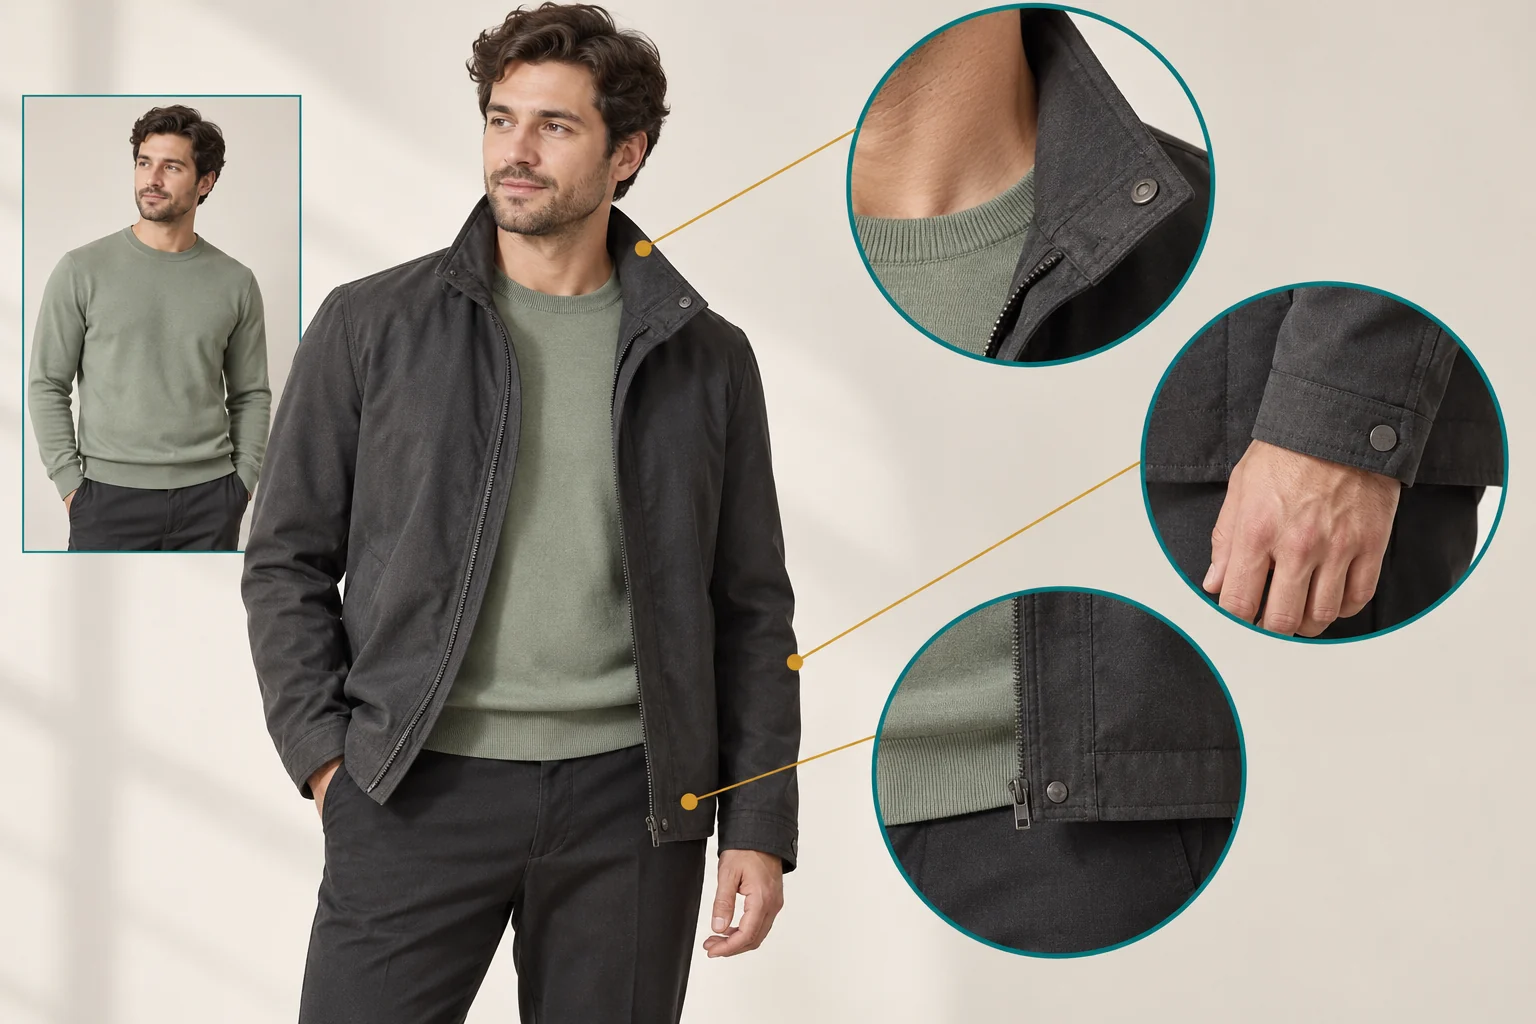
Quick answer: removing a jacket requires replacing the area it covered. Use local generation for a plausible covering outfit, a matching reference photo for real garment detail, manual repair for small visible regions, or new photography when accuracy cannot be verified. Check the collar, cuffs, silhouette and shadows separately.
A jacket is a difficult object to remove because it changes the person's visible shape and covers clothing, hands or background at the same time. Selecting it is only the beginning. The editor also needs a coherent answer for every area that becomes visible.
This guide compares four useful workflows for a fully clothed fashion photograph. It explains how to choose a method from the source image, how to handle the jacket's main boundaries and how to decide when a reconstruction is acceptable. The aim is a controlled edit, not an unsupported promise of a perfect result.
1. Read the source photograph before editing
Identify the jacket's outline, lapels, collar, sleeves and hem. Then examine what is visible underneath. An open jacket over a plain sweater supplies more garment information than a closed coat. Neither image supplies the pixels of the concealed fabric.
Check the person's hands. Are they outside the jacket, holding the lapel or hidden in pockets? Removing a pocketed jacket can also require deciding where a hand should appear. If the pose cannot be verified from another photograph, a new shot may be more appropriate than an invented pose.
Study the light and background. A jacket can cast a shadow onto the base top, wall or trousers. Its bulk can cover a strip of the room outside the body's outline. The replacement needs to account for both fabric and scene geometry.
Finally, define the use. A styling concept can accept a plausible, fully covering base garment. A catalogue photograph of a specific sweater needs evidence for its real construction. Document that difference in the brief so that approval is based on the right standard.
2. Choose among four workflows
| Workflow | Useful when | What to verify |
|---|---|---|
| Selected-area generation | A plausible base outfit is acceptable | Generated construction, identity and edges |
| Reference-photo compositing | A matching image shows the actual base garment | Pose, scale, perspective and light alignment |
| Manual local repair | Only a small area needs reconstruction | Repeated texture and continuity of folds |
| New photography | The hidden garment or pose must be exact | Production consistency and approved styling |
You can combine methods. A reference layer may supply the real sweater while a small generated patch repairs the background. Keep the steps separate in the working document, because a later revision may affect only one part of the image.
3. Workflow one: replace the jacket with local generation
Open a working copy in an editor that supports selected-area replacement. Select the jacket, including both sleeves and the complete hem. Protect visible hands, hair and any base garment details you want to preserve. Leave the original accessible as a layer or separate document.
Specify the desired covering garment rather than using an undefined removal request. The prompt should describe type, coverage, colour and light. Avoid unrelated changes to the room or pose until the garment edit is approved.
Replace the selected charcoal outer jacket with a fully covering sage long-sleeve crewneck sweater. Follow the visible sweater colour and neckline. Preserve the adult's original face, hair, hands, trousers and pose. Match the existing soft light and keep the background geometry unchanged.
Generate a candidate and compare it with the untouched original. If the jacket's outline remains as an oversized sweater shape, revise the selection or use a reference for the intended silhouette. If the hand changes, restore the source hand rather than treating a preservation instruction as a guarantee.
Adobe's Generative Fill documentation describes selected-region editing. For this job, a local selection helps keep the request bounded. The result still needs visual inspection and cannot establish the real details that the jacket concealed.
4. Workflow two: composite a matching reference photograph
The strongest reference is another photograph of the same adult wearing the actual base outfit, in similar light and a similar pose. A product-only garment shot may help with design, but adapting it to a body involves more perspective and folding work.
Place the reference in a separate layer and align stable landmarks such as the neck, shoulders and waist. Compare scale and camera angle before blending. If the torso is turned differently, a simple resize will not make the fabric and seams agree.
Use a layer mask to reveal only the needed garment region. Keep original face, hair and visible hands where appropriate. Blend along natural clothing boundaries rather than through important facial or anatomical details. Use a restrained edge transition so the composite does not create a halo.
Match brightness and colour locally. A sweater photographed under cool daylight can look out of place in a warm interior. Use the surrounding garment and scene as reference points, while preserving actual construction. Save those adjustments separately so they can be revised.
Photopea's mask documentation explains reversible hiding and revealing of layer regions. That is useful for reference compositing because you can change the blend boundary without deleting the source photographs.
5. Workflow three: repair only a small affected area
Manual cloning and local repair are useful when the missing region is limited and nearby fabric supplies appropriate texture. For example, a small jacket flap crossing a plain sweater may be easier to repair than an entire concealed sleeve.
Choose a source patch with similar light, fold direction and scale. Copying fabric from a bright upper chest into a dark underarm can create a visible tonal mismatch. Reusing the same patch repeatedly can also produce recognisable texture stamps.
Work on a separate repair layer and inspect the result at normal size and a close view. Preserve important seam lines and avoid smoothing the whole area to hide one boundary. If the fabric's structure is unknown, stop treating manual repair as evidence of the true garment.
Content-aware or object-removal features can be useful for small background areas, but a jacket crossing a torso requires a defined garment replacement. Adobe's Delete and Fill Selection guide describes filling from surrounding content. Test its result locally rather than assuming it understands concealed clothing construction.
6. Workflow four: photograph the outfit without the jacket
Choose new photography when you need the real sweater, exact fit or a reliable pose. This is particularly useful for product launches, hero images and clothing with a distinctive print. An edit that looks plausible cannot verify those details.
Plan the shot to match the existing image if the set must remain consistent. Note the camera height, lens or field of view, framing, light direction and background. Keep a reference frame visible during the shoot so that you can compare the pose and crop.
Prepare the base garment properly. Remove lint, arrange the collar, check cuffs and make sure the person is comfortable with the approved styling. A carefully prepared source reduces later retouching without requiring fabricated garment information.
New photography still needs review. It can introduce wrinkles, colour differences or a changed crop. The advantage is that it supplies actual evidence about the garment and pose, which an unseen-region reconstruction cannot provide.
7. Repair the neckline and shoulder outline
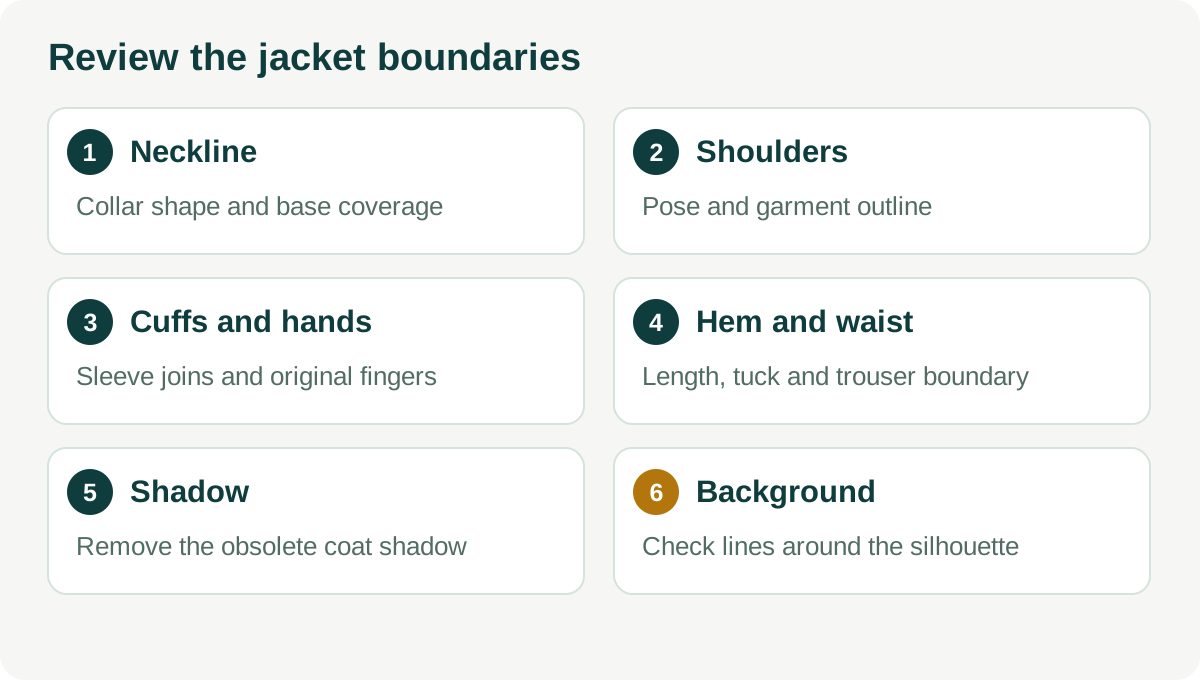
The jacket collar often overlaps the base garment and casts a small shadow. After replacement, check that the sweater neckline forms a continuous shape and follows the angle of the neck. Look for fragments of lapel, duplicated collars or fabric that appears to float away from the shoulder.
Compare both shoulders against the pose. A padded jacket may have a wider outline than the sweater underneath, but the editor should not casually change the person's anatomy. Use a reference photograph to establish the intended garment fit where possible.
If one shoulder is wrong, make a local repair rather than regenerating an accepted opposite shoulder, hand and background. Keep the earlier candidate so you can inspect whether the repair introduces a new mismatch. This makes the process easier to audit and revise.
8. Repair cuffs, hands and the hem
At each wrist, verify that the base garment sleeve meets the original hand naturally. Watch for a jacket cuff left behind, a sleeve ending at the wrong angle or fingers blending into fabric. Hands should be compared with the source rather than judged only by overall plausibility.
At the waist, check the garment length and how it meets the trousers. A generated sweater may accidentally preserve the jacket hem or create an implausible tuck. State whether the base top is tucked or untucked in the brief and verify it in the final image.
Inspect objects that crossed the jacket: a bag strap, necklace or watch may need preservation in a separate layer. Do not let a local clothing edit silently remove an accessory the client expects to remain. Each important overlap deserves a deliberate decision.
9. Rebuild the affected shadow and background
A convincing replacement garment can still fail because the old jacket shadow remains. Compare the wall, base top and trouser area for a dark edge that no longer has a source. Adjust that region separately while maintaining the scene's original light direction.
Look at background lines near the new silhouette. Door frames, tiles and shelves should remain continuous. Repeated texture, bent geometry or a blurry strip can reveal the edit even when the clothing itself looks natural.
Check sharpness across boundaries. A crisp source portrait with a soft generated sweater creates a mismatch; excessive sharpening can introduce halos. Aim for consistent detail at the final delivery size rather than applying the same filter blindly to every layer.
10. Approve and export against the actual brief
Review the original beside the edited version, then inspect the intended crop. Confirm that the person remains fully clothed, identity and pose are approved, and the base garment is appropriate for the stated use. For a product image, compare actual construction and colour with the real item.
Keep an editable master with source photographs and repair layers. Export a separate final file using the destination's current requirements. Check dimensions, file type and colour after download. A saved preview is not necessarily the same file that a publishing system receives.
Archive the permission record, the approved brief and the final version together. If a client requests a revision, this lets you change the garment without losing the agreed portrait details. The cost guide explains how to include that repair and approval time in a realistic budget.
Plan a matching reference frame during the next shoot
If jacket removal is a recurring request, capture an approved frame with the outer layer off during the original session. Keep the person, camera and light in place and photograph the fully covering base outfit before changing the set. Add detail views of the neckline and cuffs when those features matter. This reference can supply real garment information for later compositing and makes the editing brief less dependent on reconstruction.
Keep both frames together with notes about the pose and garment. When a later edit is requested, first compare the reference for usable alignment rather than generating a new sweater immediately. Even a close match can need adjustments around the shoulders or waist, but the source now contains evidence for the product's actual construction. That is a practical improvement you can build into production, instead of trying to repair every missing detail after the shoot.
Frequently asked questions
Is an open jacket easier than a closed jacket?
An open jacket usually provides more visible information about the base garment. The covered regions still need reconstruction or a real reference. Evaluate the neckline, sleeves and side seams rather than assuming the whole job will be simple.
Can a mask alone remove the jacket?
A mask hides pixels; it does not supply what belongs behind them. You need another layer, a reconstruction or a photograph of the actual outfit. That distinction explains why deleting a jacket selection can leave a hole rather than a finished portrait.
What should I do when a hand was inside a pocket?
Look for another approved photograph showing the pose, or take a new shot. A generated hand position is an invented change and may not fit the project. Do not assume the original photograph contains that missing evidence.
Which workflow should a beginner try first?
Use a clear source with a plain visible base top and a small, local edit. Keep the original and review every boundary. For a specific product, start with real references and the clothing change workflow rather than relying on an unrestricted removal request.