How to Remove Clothes from a Photo: A Practical AI Guide
A complete outer-layer editing workflow: prepare the image, select the garment, write a useful prompt and check the final result.
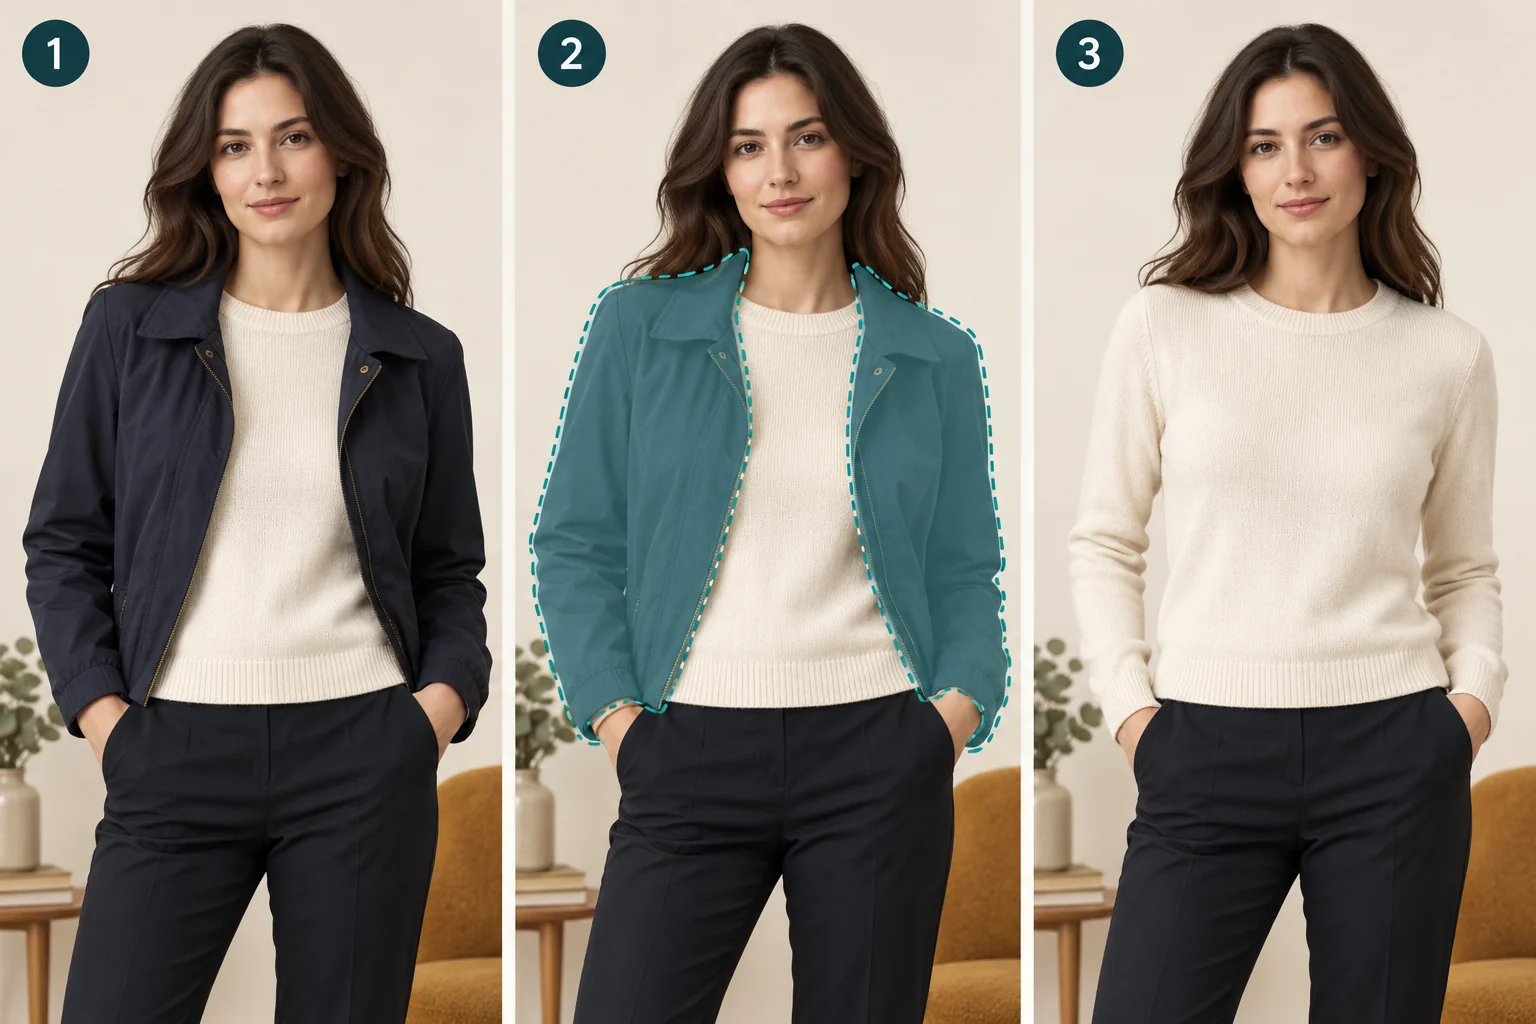
Quick answer: to remove an outer clothing layer from a photo, select that layer, specify a fully covering replacement garment, generate or composite the replacement, then repair the boundaries. A photograph does not contain the hidden garment's missing pixels. Any generated replacement is an estimate, even when it looks convincing.
Searching for how to remove clothes from a photo often leads to vague promises about instant results. For a useful fashion edit, the real question is more precise: can you take a coat, scarf or overshirt out of the frame while keeping a believable, fully clothed portrait? That is an image reconstruction problem, and the answer depends on the original photograph.
This guide covers non-intimate apparel editing with permission from the people involved. It explains how to prepare a source image, choose an editing method, build a selection, describe the intended result and evaluate the output. The same principles help with lookbook revisions, styling previews and personal photographs where an outer layer distracts from the outfit.
1. Understand what the edit can actually recover
If an open jacket reveals a sweater at the centre of the chest, the editor has some evidence about its colour and texture. It still cannot see the sweater's covered shoulders, side seams or sleeves. A generative tool creates plausible content for those regions; it does not reveal an original hidden photograph.
That distinction matters when accuracy is part of the brief. For a mood board, an approximate cream sweater may be sufficient. For a listing selling a specific sweater, an invented neckline, knit pattern or logo can misrepresent the product. Use another photograph of the real garment, or take a new photograph, when those details must be correct.
Write down the desired final image before opening an editor. A useful brief might be: “Same adult, same pose and room, navy coat removed, fully covering cream crewneck sweater visible, no change to face or hands.” This turns an ambiguous request into a set of visible acceptance criteria.
2. Choose the method from the available evidence
| Situation | Useful starting method | Main limitation |
|---|---|---|
| Open coat over a plain, visible sweater | Selected-area generative replacement | Covered sweater details remain invented |
| Matching photo with the coat already off | Reference compositing with layer masks | Pose, scale and light need alignment |
| Small scarf overlapping a plain top | Local repair plus a restrained fill | Collar shadows may need separate correction |
| Exact product construction is essential | Reference photography or a reshoot | Requires the actual garment and production time |
Do not select a method solely because it contains “AI” in the name. A masked colour adjustment, a simple composite or a new photograph may give more control with fewer retries. The comparison in our fashion editing tools guide explains the controls worth checking.
3. Prepare the photograph and reference files
Use the original camera file when possible. A screenshot or an image forwarded through a messaging app may lose fine texture and introduce compression around seams. Save a working copy and keep the untouched original in a separate folder. Name files by project, view and revision so that you can return to a known starting point.
Look for an image with clear garment edges and useful detail in both highlights and shadows. A dark jacket against a dark wall is harder to select than one against a distinct background. Crossed arms, long hair, shoulder bags and hands in pockets create overlaps that need individual attention.
Gather any legitimate reference images: the actual base garment laid flat, another pose of the same person, or a close-up of its collar and cuff. A front product photograph can help establish construction, but it does not automatically solve the perspective of fabric wrapped around a torso.
Before uploading, check who operates the editor, what permissions you have for the photograph and whether cloud processing is acceptable for this project. Do not treat a “free” badge as a privacy policy. For a client portrait, agree on the processing service and final use before sending files to it.
4. Build a selection that follows the outer layer
Selection quality often matters more than prompt length. Start around the jacket or coat rather than the whole person. Include its sleeves, lapels and hem, but protect visible hands, hair, jewellery and the base garment wherever possible. Work at a zoom level where the boundary is clear without losing the overall silhouette.
An outer layer covers two different things: the base outfit and parts of the background. The strip outside the torso may need the wall reconstructed, while the area inside the silhouette needs a sweater. If one generation mixes these regions badly, separate them into smaller operations instead of repeatedly using a larger mask.
Keep the original above the generated layer when your editor supports layers. A mask can restore unchanged fingers, hair or facial details from the original. This is more controllable than asking a model to reproduce the entire portrait exactly. A preservation instruction helps express intent; it does not guarantee unchanged pixels.
Adobe's Generative Fill documentation describes editing selected regions with a prompt. Use that selection-based approach to constrain the task, rather than expecting a general instruction to identify every overlap correctly.
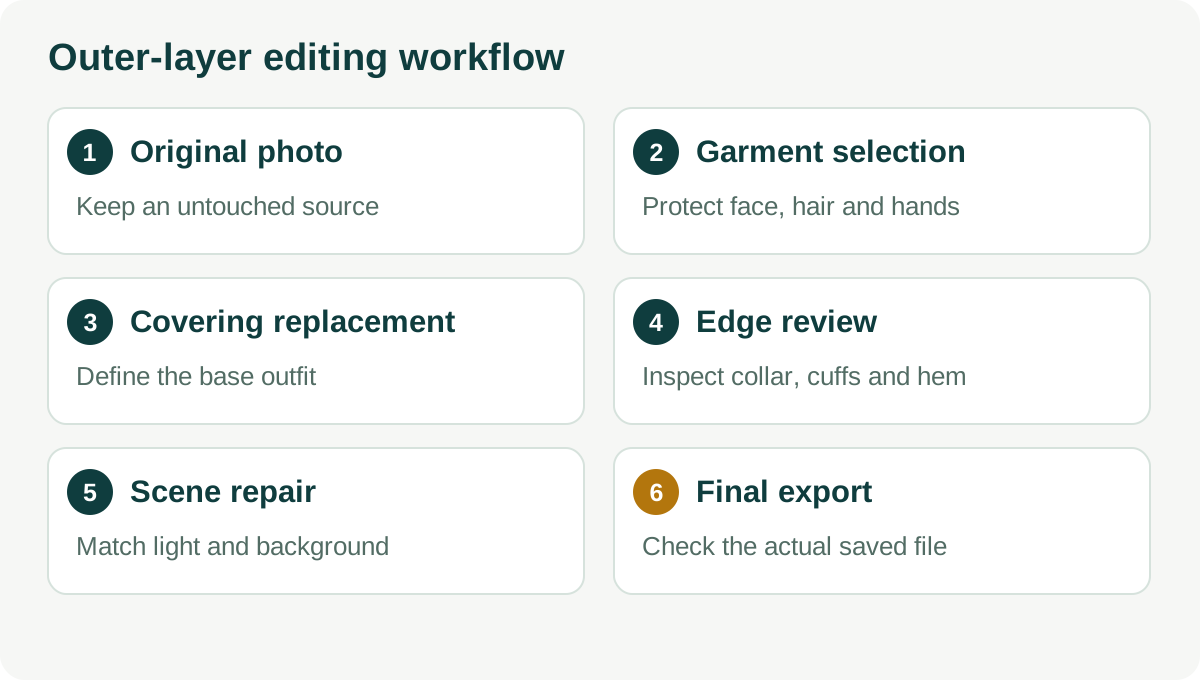
5. Describe the final garment, not only the removal
A removal instruction describes what should disappear but may leave the replacement undefined. State what belongs in the selected area. Include the garment type, coverage, colour and a small number of visible construction details. Then describe the source lighting and the parts of the image that should remain unchanged.
Replace the navy outer jacket with the continuation of a fully covering cream long-sleeve crewneck sweater. Keep the adult's original face, hands, pose, trousers and background. Match the existing soft window light, sweater folds and natural shoulder shape. No new accessories or text.
For a scarf, narrow the request: “Replace the selected wool scarf with the existing fully covering blue shirt collar and upper chest fabric; keep the shirt buttons and background consistent.” If the shirt has an exact pattern, use a real reference or a manual composite instead of demanding that an unseen pattern be recovered.
Avoid stacking competing style requests such as cinematic lighting, a new location and a different pose onto a local garment edit. Those changes expand the task and make it harder to tell why the output failed. Establish the clothing edit first; make other creative revisions on a separate version.
6. Generate, compare and revise one variable at a time
Save the first plausible result before generating more. Compare candidates against the original at the same size, not against a previous edited version. Repeatedly feeding a flattened output back into an editor can accumulate changes to texture, identity and background even when each individual change seems small.
Classify a failure before revising it. A coat-shaped bulge in the sweater may indicate an overly narrow selection. A changed hand may indicate that the hand was included in the mask. Incorrect fabric may require a clearer garment description or reference. A bright patch may need a lighting adjustment rather than a new garment.
Change one factor, record the result and stop when the remaining error requires information you do not have. More retries cannot prove that an invented garment matches reality. Set a retry budget for the project so that an uncertain reconstruction does not consume more time than reference photography would.
7. Inspect collars, cuffs, shadows and background edges
First check the neckline. It should connect naturally to the shoulders, follow the pose and provide the intended coverage. Then check both cuffs and hands. Count visible fingers, inspect wrist boundaries and look for seams that end abruptly where a sleeve used to be.
Next inspect the torso silhouette. Removing a bulky coat changes the visible outline, but an editor should not casually reshape the person. Compare shoulder width, arm position and waist placement to the original. Use a real reference if the new silhouette needs to represent a particular fit.
Finally inspect light. A jacket may have cast a shadow onto the sweater or wall. A replacement can look convincing in texture but still preserve an impossible coat shadow. Repair the affected shadow separately, using nearby lighting as a reference. Check the background for repeated tiles, bent lines and smudged furniture.
8. Troubleshoot recurring problems without guessing
- A fragment of lapel remains: return to the original selection and include the full outer-layer boundary. Check both sides of the neckline.
- The sweater looks painted on: reduce excessive smoothing and compare folds with the source pose. An actual garment reference may be necessary.
- The face changes: restore it from the original layer, or restrict the edit to a garment selection. Do not approve a portrait solely because the outfit looks good.
- A hand merges with a sleeve: preserve the hand separately and repair the cuff junction. A whole-image retry may alter more than it fixes.
- The replacement has invented text: remove the generated lettering from the editable version. Reapply authorised artwork manually if the brief requires it.
These checks are especially important for small published images. A mistake hidden in a zoomed-out preview can become prominent in a product detail view, a large display or a crop. Inspect both the intended viewing size and a close view of the garment before final approval.
9. Export a file that matches the destination
Keep an editable master with the original, selection and repair layers. Export a separate delivery file at the dimensions requested by the actual website, client or platform. There is no universal Amazon, Shopify or social-media size that fits every image type and placement.
Use JPEG or WebP for ordinary opaque web photographs when supported; use PNG when transparency is needed. Check the delivered pixel dimensions, file weight and colour appearance after export. Increasing dimensions does not restore missing real textile detail, so inspect the exported file instead of trusting an “HD” button.
For product listings, verify that the image still depicts the product being sold. Google's AI-generated content guidance also explains metadata requirements for generated Shopping images. Follow the destination's current rules; a caption and embedded provenance metadata serve different purposes.
Archive the original, the approved version, the prompt or edit notes, and the approval record together. If a client later asks why a seam changed or which file was published, this small record is more useful than an unexplained folder of downloads.
A useful review note for a coat edit
Suppose the source shows an open coat over a plain sweater and the project is an internal styling presentation. Record the acceptance decision in concrete terms: original face retained, hands restored from the source, sweater neckline approved, background edge repaired, generated side seams accepted for concept use. Keep the annotated comparison with the chosen candidate. This explains why the picture was approved without claiming that unseen details were recovered.
If the same image is later proposed for a listing selling the sweater, review it again against the real product. The earlier concept approval is insufficient for that new purpose. Ask for a matching garment photograph and check the knit, cuffs and hem before delivery. Changing the destination can change the required evidence even when the pixels in the file stay exactly the same.
Frequently asked questions
Can AI reveal the actual clothes underneath a coat?
No. A single photograph does not include the covered details. A tool can generate a plausible covering garment, but only a real reference photograph can supply evidence about the garment's actual construction. Treat the result as a new edit and evaluate it against the intended use.
Is a fully visible base garment easier to preserve?
Visible colour, collar and fabric give the editor more reference information. They do not guarantee that the hidden areas will be correct. Use smaller selections, preserve original visible regions and compare each important seam or pattern with a reference when accuracy matters.
Should I use AI for a commercial product photograph?
It can assist with an approved fashion workflow, but the photograph, subject permissions, tool terms and product accuracy all need checking. A convincing output is not proof of commercial rights. Our consent and copyright guide separates these checks.
When is a new photograph the better option?
Choose reference photography or a reshoot when the concealed garment must be exact, the pose hides major boundaries, or the edit changes the fit in ways you cannot verify. The right method is the one that supplies the information needed for the final image.